It’s been a while

…Allow me to explain.

At the end of last summer, my wife and I decided to finish our basement. We’d planned on doing so since we bought our house three years ago, and we thought this past Winter would be a good time to tackle the project.

former gym

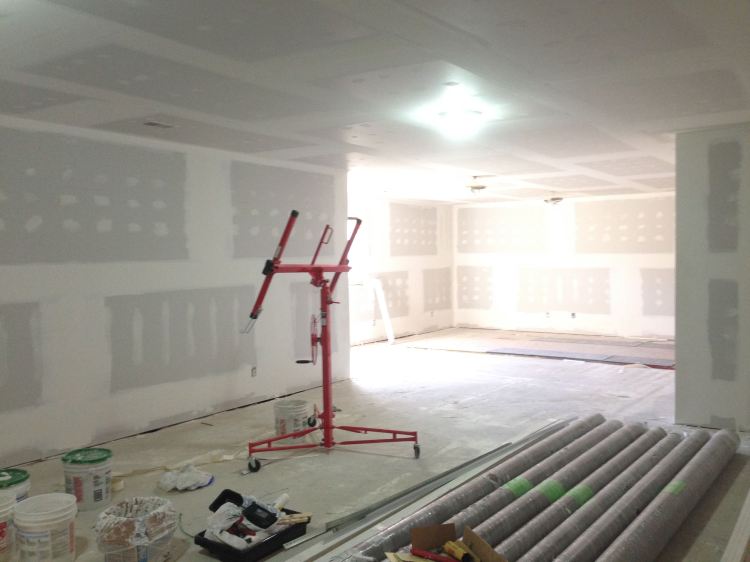
The space formerly known as the gym

Shortly after that decision was made, I was recruited for a position at a new employer. It was a good opportunity, and I accepted an offer in the Fall. The only down side was that this new employer was located an hour and a half’s drive from our house.

Since it was Fall, we decided to carry on with the basement project, as doing so would increase the value of the house in time for the local real estate market to heat up in the Spring. We’d deal with the long commute, and move as soon as we could sell the house.

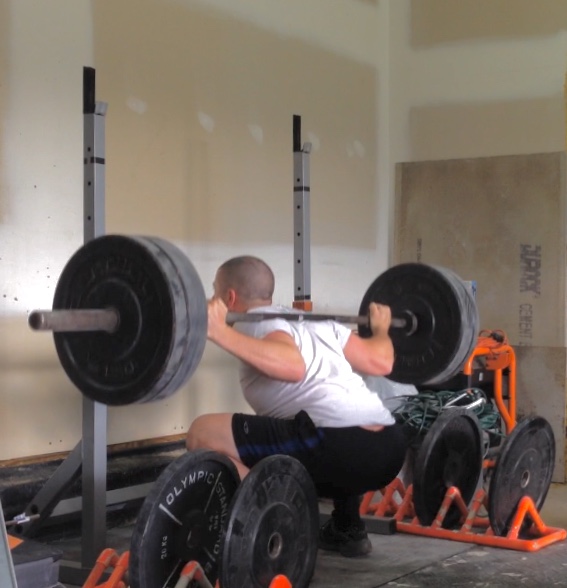
For the first few months, I continued to train, but cut back on volume and treated the remodeling project as accessory work. After all, hanging drywall isn’t exactly a cake walk. By time January rolled around, I realized the schedule was getting tighter and cut back even further on lifting in order to get further on the basement.

…And then it happened. I was wrapping up an evening of successful drywall work. With one last piece to hang, I had two cuts and few screws between me and dinner. Sure enough, I slipped on the second cut and caught my thumb to the tune of four stitches.
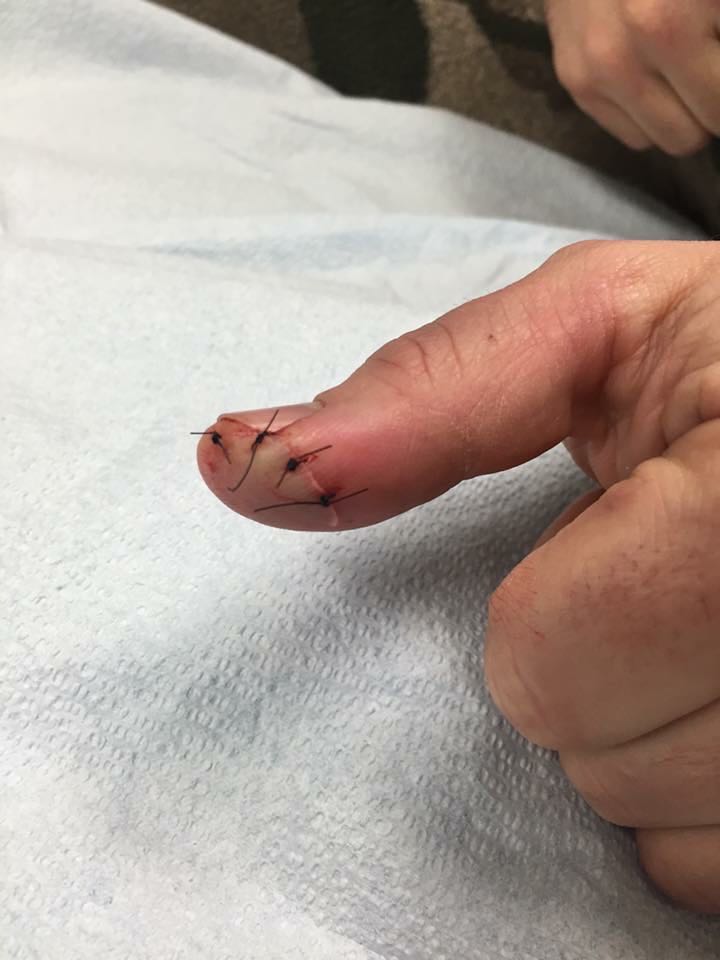
stitches

Stitches

Lifting stopped. Drywall stopped. I couldn’t grip anything for three weeks.

By time the cut had healed, the schedule was blown, and the priority list no longer included lifting. From February through April, it’s been a mad dash to get the basement finished, get the house listed and sold, and find a new house closer to the new job.

We finished the basement in March, but since that’s where the gym was, I couldn’t exactly jump back into lifting. Further, it’s been until last week that we’ve been wrapping up the details for selling and buying the homes. Now that life has calmed back down, the urge to reclaim my physical capacity has inspired me!

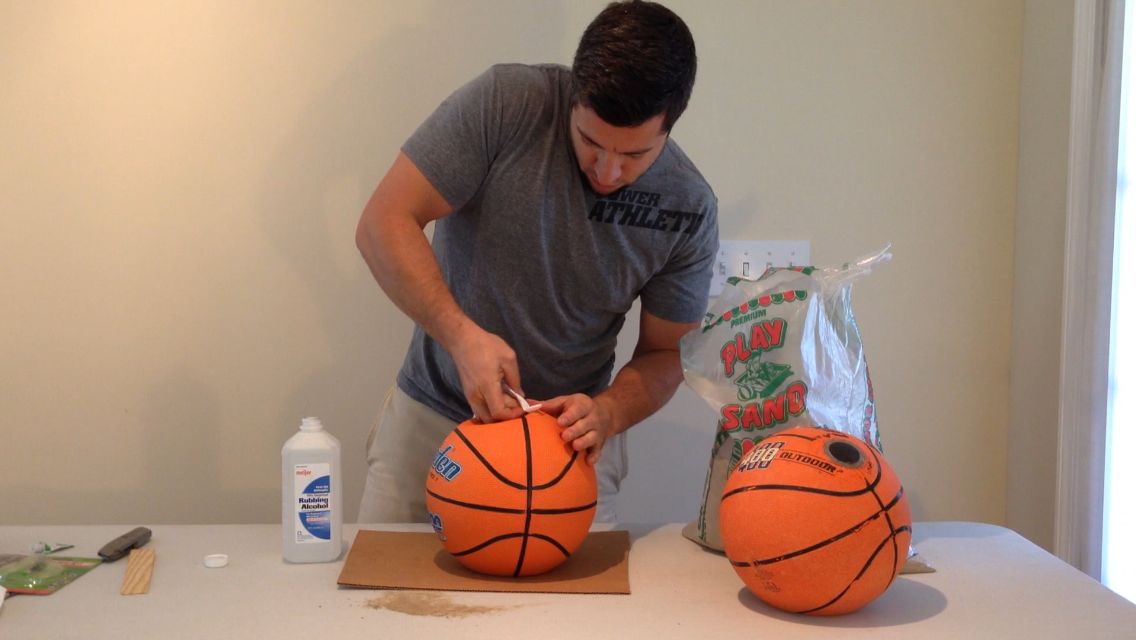
I cleared out a space in my garage. It’s only about 50 square feet, but its room enough for the old squat stands, a barbell and a few plates.

The simple bare necessities!

The simple bare necessities!

Since we haven’t moved yet, time is still limited. And, with the four month hiatus, I’m not exactly in peak condition. The plan, then, is simply to start where I am: lift a few times per week, hit the major lifts, and slowly progress. For the next few weeks, I won’t be on any particular program. I’ll just be trying to do a little more each time in order to re-acclimate to lifting.

It’s a long road… but it’s worth the effort! Here’s to new beginnings!

Refurbish AB Hyper Bench

In previous posts, I covered how to refurbish a bench and how to reinforce a bench. This is going to be similar to the former, in that I’ll be doing some refurbishing work. I happened across this piece of equipment when someone along my commute was discarding it. There was nothing functionally wrong with it, though I did discover it was not in usable condition.

Ab Hyper Bench

Ab Hyper Bench

I brought it home and disassembled it. Upon doing so, I discovered that the wood had rotted and the padding was moldy. I kept the pieces around just long enough to make a template, then promptly discarded them. For as bad as the wood and padding were, the vinyl coverings and metal frame were in good condition.

Disassembled

Disassembled

Since the vinyl was black and didn’t need to be replaced, I decided to change the color of the framework to Garage Gym’s signature fluorescent orange. In retrospect, I should have put a light-colored primer on first. This would have reduced the amount of orange paint I needed to apply, and would have improved the finish. Regardless, it’s orange now!

Garage Gym Orange

Garage Gym Orange

I cut new pieces of wood from the measurements of the old ones, taking extra care to get the Tee nuts in the right locations for reassembly. Next, I layered pieces of carpet foam from a previous project onto the pieces of wood, stapling them into place. Finally, I carefully replaced the vinyl covering and secured it with staples.

Refurbished Upholstery

Refurbished Upholstery

With orange framework and freshly cleaned up benches, I reassembled the entire bench. The end result, as per usual, is a nice piece of equipment for significantly less than the retail price!

Finished Ab Hyper Bench

Finished Ab Hyper Bench

Have you refurbished used equipment? Let us know about it in the comments or over on the facebook page.

DIY PVC Hurdle

DIY Adjustable PVC Hurdle

DIY Adjustable PVC Hurdle

Today we’re going to build an adjustable PVC hurdle. If you ever do plyometrics as part of your training routine, or if you’ve had the unpleasant experience of missing the landing on a box jump, a hurdle can be an excellent addition to your training gear.

Materials

  • 4 – ¾” PVC schedule 40 pipe @ 48”
  • 2 – ¾” PVC elbows
  • 3 – ¼” bolts, 3” long
  • 1 – ¼” bolt, 4” long
  • 4 – ¼” flat washers
  • 4 – ¼” nuts
  • 1 – ¼” clevis pin, 3” long
  • 1 – cotter pin

Tools

  • Drill
  • Drill guide, if available
  • Wrench
  • Saw
Materials and Tools

Materials and Tools

Begin by cutting a 6” long piece from one of the long pieces of PVC pipe. Cut the remaining (42”) piece in half. These pieces will be a furring strip and the legs, respectively.

Measure Twice, Cut Once

Measure Twice, Cut Once

Next, locate and mark the center, lengthwise, of a full piece of pipe. Using the ¼” drill bit, drill straight through the pipe at the center mark. The drill guide came in very handy for ensuring the hole was drilled as intended. Repeat this on a second piece. These are the cross-members of the hurdle.

Drilling with the Drill Guide

Drilling with the Drill Guide

Before you bolt them together, mark a distance ¾” from the end of each piece. Drill a hole at this mark, making sure that it is co-planar with the center hole in each piece. I used a bolt and a speed square to accomplish this. On one of those pieces, drill two more holes – one at 2”, the other at 5”. Again, make sure the holes are all co-planar.

Using a Speed Square and a Bolt to keep Holes Coplanar

Using a Speed Square and a Bolt to keep Holes Coplanar

Now you need to drill the same sequence of holes in the 6” piece of PVC pipe. Mark the locations ¾”, 2” and 5”. Drill all three holes, ensuring they are co-planar. Bolt the 6” piece of pipe to the long piece of pipe with the matching holes. Use 3” bolts to attach the two pieces at the 2” and 5” mark. The third hole will be used later.

Marking the Furring Strip

Marking the Furring Strip

Next, bolt the two long piece of pipe together at the center hole. When doing so, make sure the furring strip aligns with the second pipe. This will ensure that the upper piece of the hurdle runs straight across, rather than at an angle. On the ends of the pipes that do not have holes, install the 90-degree elbows. Then, install the two pieces of pipe that form the feet.

Cross Members with Center Bolt

Cross Members with Center Bolt

With the remaining long piece of pipe, mark and drill a hole at ¾” from one end. Using the 4” bolt, attach this piece to the end of the cross-member with the furring strip. The final step is to mark and drill the holes that correspond to the various heights you wish to achieve. The standard hurdle heights in track and field are 27”, 30”, 33”, 36”, 39” and 42”. Manipulate the hurdle to the corresponding height and mark the intersection of the cross-member and the top bar. Repeat for the remainder of the heights you want to have.

Marking for Various Heights

Marking for Various Heights

Once marked, remove the top bar and drill the holes for each position. Again, make sure these holes are coplanar with the very first one. Once all the holes are drilled, re-attach the top bar with the 4” bolt. Use the clevis pin and cotter pin to select the desired height.

Fully Assembled Adjustable Hurdles

Fully Assembled Adjustable Hurdle

Lift heavy, run fast and JUMP HIGH!

DIY PVC Hurdle

DIY PVC Hurdle

Should you prefer a simpler design, I mocked up a non-adjustable version. Give either a try and let me know how it works in the comments or over on facebook!

Simple PVC Hurdle

Simple PVC Hurdle

Thanksgiving

It’s the Thanksgiving holiday here in the USA, a time when we should all take a moment to reflect on all that we have to be thankful for. There are many things for which I’m thankful, but I’ll stay on point for this forum. I’m thankful for the opportunity to share my experience and knowledge with like-minded Garage Gym Guys and Girls!

Ryan's Garage Gym

Ryan’s Garage Gym

I sincerely appreciate all of the interactions I’ve been able to have through this blog, and I hope that you all get as much out of it as I do. Indulge me for a moment, as I share one of these recent interactions.

Ryan is a CrossFitter and Olympic Weightlifter who has been building a gym in his garage. Here are his words, and a couple pictures of his gym.

“I just recently moved and sold my CrossFit Business. I wanted a place to work out but wasn’t sure if I would fit into another CrossFit box. Therefore, I reached out to Eric the Garage Gym Guy. I came across his blog several months ago and I was impressed with his work. My plan was to build a Garage Box and I didn’t quite know what pieces of equipment I wanted. When I emailed Eric, he messaged me back very quickly and took the time to help me with no strings attached. He didn’t hesitate to give me his advice and I am so glad he did. I don’t recommend anyone setting up their Garage box on their own without Eric’s insight. Eric is the source I am going to continue to use in regards to setting up my Garage Gym needs in the future.”

So, to Ryan and all you other Garage Gym-ers out there, THANK YOU, and have a safe and happy Thanksgiving!

Bruce Lee Graphic on Ryan's Lifting Platform

Bruce Lee Graphic on Ryan’s Lifting Platform

DIY Slam Ball

Materials:

Rubber Basketball

Playground Sand

Funnel

Isopropyl Alcohol

Tire Patch Kit


Slam balls are a great tool for developing explosive power and working on conditioning with a functional, full-body movement. In addition, a slam ball can be used place of a medicine ball. While a commercially produced slam ball can be a bit expensive, you can make your own for a fraction of the price.

Mark the Cutting Area

Mark the Cutting Area

Start by laying a patch on the basketball. Mark the perimeter of it, so when you cut the hole, it doesn’t exceed the patch. Now, cut an X into the basketball. Insert the funnel, and fill the basketball with sand. A basketball can hold as much as 25 lbs. of sand. You may need to shake the ball as you fill it to help the sand settle out evenly.

Fill with Sand

Fill with Sand

Once the ball is filled to the desired weight, set the ball with hole right at the top. Shake the ball lightly to allow the sand to settle away from the hole. Reach into the hole and try to brush away any sand that might be stuck to the underside of the X. Wet a paper towel with the isopropyl alcohol. Use the paper towel to clean the inside surface of the basketball near the hole.

Clean the Patching Area

Clean the Patching Area

Follow the instructions on the tire patch kit to apply one half of the patch to the inside of one half of the X-hole in the basketball. Hold the patch in place until the rubber cement begins to set. I used a wooden shim to help keep the patch in place. Once it’s set, allow 12-24 hours for the cement to fully cure. Once fully cured, repeat the process for the other side. Apply rubber cement over the cuts of the X liberally to ensure a good seal.

Place the Inner Patch

Place the Inner Patch

After the inner patch is fully cured, prepare a second patch for the outside. Follow the instructions on the patch kit, and apply it over the X. Again, wait 12-24 hours for the cement to cure, while occasionally checking for full adhesion. If necessary, add a little more rubber cement to any areas that don’t appear to be adhering.

Place the Outer Patch

Place the Outer Patch

Once the cement for the outer seal has cured, press on the ball and listen for air leaks. If there is a leak, try to locate it and add rubber cement to close it. When there are no more leaks, test the slam. I did this by dropping the ball form a moderate height. I did this to avoid the eruption of sand that might occur form a full slam if the patch didn’t hold. If the drop test is successful, proceed to a full slam. If the slam is successful, keep calm and slam on!

DIY Slam Ball

DIY Slam Ball

As always, let us know how this project works for you in the comments below, or over on the Facebook page.

DIY BBQ Smoker

You know what one of my favorite things about lifting heavy weights is? You get to eat a lot of tasty food afterwards. One of the tastiest types of food is bbq. Let’s get something straight right away: grilling and bbq are two different things. I like both, and am decently practiced on the grill. I’m always up for new challenges and new adventures, so with a couple grills to start with, I set out on a new meat-preparing quest: a smoker.

I have a standard charcoal grill that I use regularly, and I stumbled across my old tailgating grill while cleaning up the garage. I didn’t want to modify the standard grill since I use it all the time, but I had no problem making modifications to the tailgating grill.

DIY Smoker Sketch

DIY Smoker Sketch

The basics of a smoker are simply that there’s a fire, where the smoke gets contained and channeled to a somewhat isolated location where the meat is. The meat is then engulfed in smoke, and in some cases, exposed to a low-to-medium cooking temperature. As such, my plan was to use the tailgate grill as my fire chamber, and the standard grill as the smoke chamber. I’d use simple ducting in between to transfer the smoke and a small amount of heat.

I sketched out my plan, took some measurements and headed off to the hardware store for the pieces I’d need. I got a 4″ duct starter to come out of the top of the tailgate grill. I used an adjustable dryer vent duct to move the smoke from the fire chamber to the smoke chamber, and I got a 5″ to 4″ adapter to connect the dryer vent to the standard grill. All told: $26.

DIY Smoker Materials

DIY Smoker Materials

Back home I set out to assemble it. I started by marking and cutting a hole in the top of the tailgate grill. I used a cut-off wheel, but you could get away with a drill and a pair of metal shears if you don’t have a cut-off wheel. I inserted the 4″ duct starter and bent the tabs over to hold it in place. Next, I cut tabs into the adapter, bent them over, and inserted that in place of the ash bin in the standard grill.

DIY Smoker Tailgate Grill

DIY Smoker Tailgate Grill

I wanted to be able to remove the tailgate grill in order to tend the fire, but wanted the ducting to stay in place. I also wanted to be able to fully disassemble the smoker when not in use. To do this, I drilled through the adapter and the duct so, and straightened some wire to make a pin. While in use, the pin holds the duct in place, and is easily removed for dis-assembly.

DIY Smoker

DIY Smoker

On it’s first use, the smoker proved functional. The setup easily channeled smoke, and in adequate quantity. I was able to reach temperatures from 130-200 degrees F. In some cases, that temperature might be a little on the low side. To make it easier to elevate and otherwise control the temperature, I plan to add some intake holes to the tailgate grill. This should allow the fire to breathe a little better, resulting in higher temperatures and a more consistent burn.

Smoked Round Steak

Smoked Round Steak

If you’ve been considering an adventure into the realm of true bbq, hopefully this gives you some ideas that are functional and cost-effective! Be sure to let us know how your setup works in the comments or over on the Facebook page!

DIY Smoker: Concept to Completion

DIY Smoker: Concept to Completion

HSPU Station

It’s been a busy week in real life here, but I didn’t want to leave you all hanging! So, I’ve got a quick, easy diy for you: an HSPU station!

In my gym, I have unfinished walls, which means that if I were to kick up against them for hand stand push ups, I’d be buried in a pile of insulation. If you’re in a similar situation, but you own a power rack, I’ve got a solution for you!

HSPU

HSPU

Start with a piece of plywood or OSB, approximately 24-30″ tall by 48″ wide. At the hardware store or lumber mill, they’ll call that a “cut-off.” If you were to get a piece cut in the other direction, it’d be called a “rip.”

C-Clamps

C-Clamps

Set your J-cups at about chest-height and place the plywood into the J-cups. Use two 4″ (or other appropriate size) C-clamps to clamp the plywood to the rack’s uprights.

Kick up, lower and push push! And don’t forget to tell us about it in the comments or over on the Facebook page.

DIY Farmer Carry Handles

Outside of heavy stones, the most bad-ass tool in the gym is the farmer carry. It’s brute strength and fine motor control. It’s strength development and work capacity. It’s lower body, upper body, grip and core, all in one!

Garage Gym Guy Lifting Stones with Rob Orlando

Garage Gym Guy Lifting Stones with Rob Orlando

So… let’s build some!

First off, this project will go much smoother if you own, or have access to, a drill press and an angle grinder. When I built mine, I did not have a drill press, so it can be done with just a plain ol’ drill. Also, a hack saw will work in place of the grinder, but it will take significantly longer, and probably make for a solid arm workout!

DIY Farmer Handle

DIY Farmer Handle

Second, if I had to do it over again, I’d simply use 2” pipe for the main bar, rather than trying to make fancy collars. I’ll show you how I built mine, and offer a few other suggestions for how you might do it a little differently.

Materials:

2 pieces of 1” pipe, 5 ft long

1 piece of 1” pipe, 18” long

4 pipe end caps

4 pieces of threaded rod 5/16” x 10-12”

5/16” Washers, Lock Washers and Nuts

4 feet of 1 ½” PVC

2 1 ½”PVC pipe couplers

4 hose clamps

Farmer Handle Materials

Farmer Handle Materials and Tools

Begin by using an angle grinder with a cut off wheel to cut the 18” pipe in half. These two pieces will be the handles. Next, find and mark the center of the 5’ pipes. Measure and mark 3 ½” from either side of the center. Repeat this marking for the handles. Drill, using a 3/8” metal bit, completely through the pipe at each of those locations, as this is where the threaded rod will be inserted.

Be careful to drill straight through the pipes! If the holes don’t line up closely-enough, the threaded rod will not be able to align for proper assembly. Since I used a hand drill for lack of a drill press, I had a little variability in mine, and had to struggle to get everything to line up.

Once all the holes are drilled, begin assembling the threaded rod. At the bottom end, I started with two nuts with a lock washer in between. This creates a sort of jam nut, assuring that the assembly cannot come unthreaded. Push the threaded rods through the long piece of pipe, and add a nut, lock washer and nut to make a jam nut on the upper side of the pipe. I left all of the nuts fairly loose to make it easier to align the threaded rods.

Now, add another jam nut, this time about 2 inches down from the top of the threaded rod. Next, add the 9” pipe handle, and finish with a final jam nut on the top. Get everything lined up, and tighten it all down.

Farmer Handle Threaded Rod

Farmer Handle Threaded Rod

Now it’s time to assemble the collars. Start by cutting four 1” lengths of the 1 ½” PVC pipe. Cut each of these again, but in the opposite direction to make a split ring. The split should remove enough material so that the ring can be squeezed tightly onto the pipe using a threaded hose clamp. These split rings and hose clamps form the stops for the collars.

To make the collars, cut four equal lengths of 1 ½” PVC pipe, roughly 9” in length. Cut the PVC couplers down the middle, such that the inner “rib” is removed. Use PVC cement to glue each of these to one of the four 9” long pieces of 1 ½” PVC pipe, flush with the end. Slide these over the metal pipe, and secure them into place by adding the metal pipe cap to each end. The collar should be trapped between the split ring and the cap.

Farmer Handle Collar

Farmer Handle Collar

If I were to go back and re-build the handles, I’d probably just use a 5’ piece of 1 ½” metal pipe instead of the 1” pipe. This would simplify the “collar” arrangement. Instead, you could simply add a flexible coupler (rubber) with a hose clamp as a stopper.

Since neither collar arrangement is precisely the same size as a barbell collar, I use a 2” spring clamp to hold the plates in place.

Farmer Carry

Farmer Carry

Time to throw a few plates on, chalk up and get carrying! As always, give it a shot, and let us know how it works out either in the comments, or over on the Facebook page.

Get a Grip: DIY Grip Tools

Here comes another simple, yet effective, DIY. Today’s items will help you build a stronger grip, which is useful for everything from deadlifting in the gym to shaking hands in an office introduction. I’m going to show you how to make cannonball/grenade ball grips and a pinch gripper.

Let’s start with the cannonball grips. I got some softballs for $3 each, eye bolts for less than a dollar each, and I had some left over tee nuts from fixing up my flat bench.

Materials

Materials

Begin by drilling a hole through the softball. Be careful to drill straight through the center of the ball. I used a 3/8″ bit to match up with my 5/16″ hardware. Now, with a flat washer near the eye, push the eye bolt through the hole in the ball. Put a tee nut on the other end to receive the bolt. Tighten it up, and you’re good to go!

Cannonball / Grenade Ball Construction

Cannonball / Grenade Ball Construction

For the pinch gripper, I used a hockey puck I had lying around. Same story here: 3/8″ hole through the middle, but this time the eye bolt had a nut and washer on the eye-end. I used a tee nut on the top side, threaded the eye bolt into it, then tightened the nut on the other end to cinch everything together.

Pinch Grip Construction

Pinch Grip Construction

I made a pair of cannonballs for doing pull ups, and either tool can be used with the loading pin for single-arm work.

Grip it and rip it!

Grip it and rip it!

Give these tools a shot and let me know how it worked in the comments or over on the Facebook page!

DIY: Reinforcing the Bench

In an earlier post, I showed you how to reupholster a bench. That method is great for taking a structurally sound bench, and dressing it up or making it into your own personalized piece of equipment. If you happen to have a bench that is not structurally sound, this post should help sort that out.

My first bench began its life as a typical adjustable bench press unit. As is typical with these types of benches, the uprights were in the wrong location for a guy my size. I used an angle grinder to quickly remedy that (I chopped them off). I dealt, similarly, with the upholstered portion of the bench.  What I had left was a solid frame with no actual bench and no more ill-spaced uprights.

Flat Bench, Version 1

Flat Bench, Version 1

My next step was to add back a flat bench. For this first iteration, I went with a couple pieces of 1/2″ angle iron screwed to a 1″x8″ board. I then added some carpet padding and wrapped it in a durable fabric. I rarely do incline or decline pressing, instead opting for overhead pressing and dips, so this worked well for a while as a basic flat bench. My bench press has increased steadily over the past few years to the point where I was no longer comfortable on this bench.

The basic structure was still adequate, but the angle iron and 1×8 board weren’t going to cut it any longer. On heavy attempts, I could feel the bench sagging under the weight and the narrow base left me feeling a bit unstable. I decided to upgrade to 1″ square steel tubing and a 2×12.

Square Steel Tube Frame

Square Steel Tube Frame

First, I drilled holes in the steel tubing so it would mount to the rest of the frame. Second, I added holes for bolting the steel to the wood. I then used the drilled steel to stencil the bolt pattern onto the 2×12. I drilled through the 2×12, and added T-nuts on the upper side of the board. From there, it was as simple as sliding the bolts through the steel tubing and the wood, and tightening them into the T-nuts.

Tee Nuts

Tee Nuts

I topped it all off with four layers of carpet padding, and wrapped it in the same durable orange fabric as before. The result is a much sturdier piece of equipment that I doubt I’ll ever out-grow.

Bench with Carpet PaddingBench with Carpet Padding

Bench with Carpet Padding

And here’s the finished product.

The Reinforced Bench

The Reinforced Bench

Got a bench that’s not keeping up with your training? Give this a shot and let us know how it turns out in the comments or over on the Facebook page!